How to use Rovo in Confluence: Guide to creating content with AI

December 15, 2025
Sometimes, creating content in Confluence can be a bit complicated because it requires having a clear idea of what you want to create or what information you want to display. Thanks to Rovo, we can now do this much more efficiently, with personalized suggestions and content adapted to the space we are working in.
Let’s break it down: how does Rovo help us create new elements in Confluence?
Easy—just click the create button, select the “Create with Rovo” option, and let yourself be guided.
Steps to Create with Rovo in Confluence
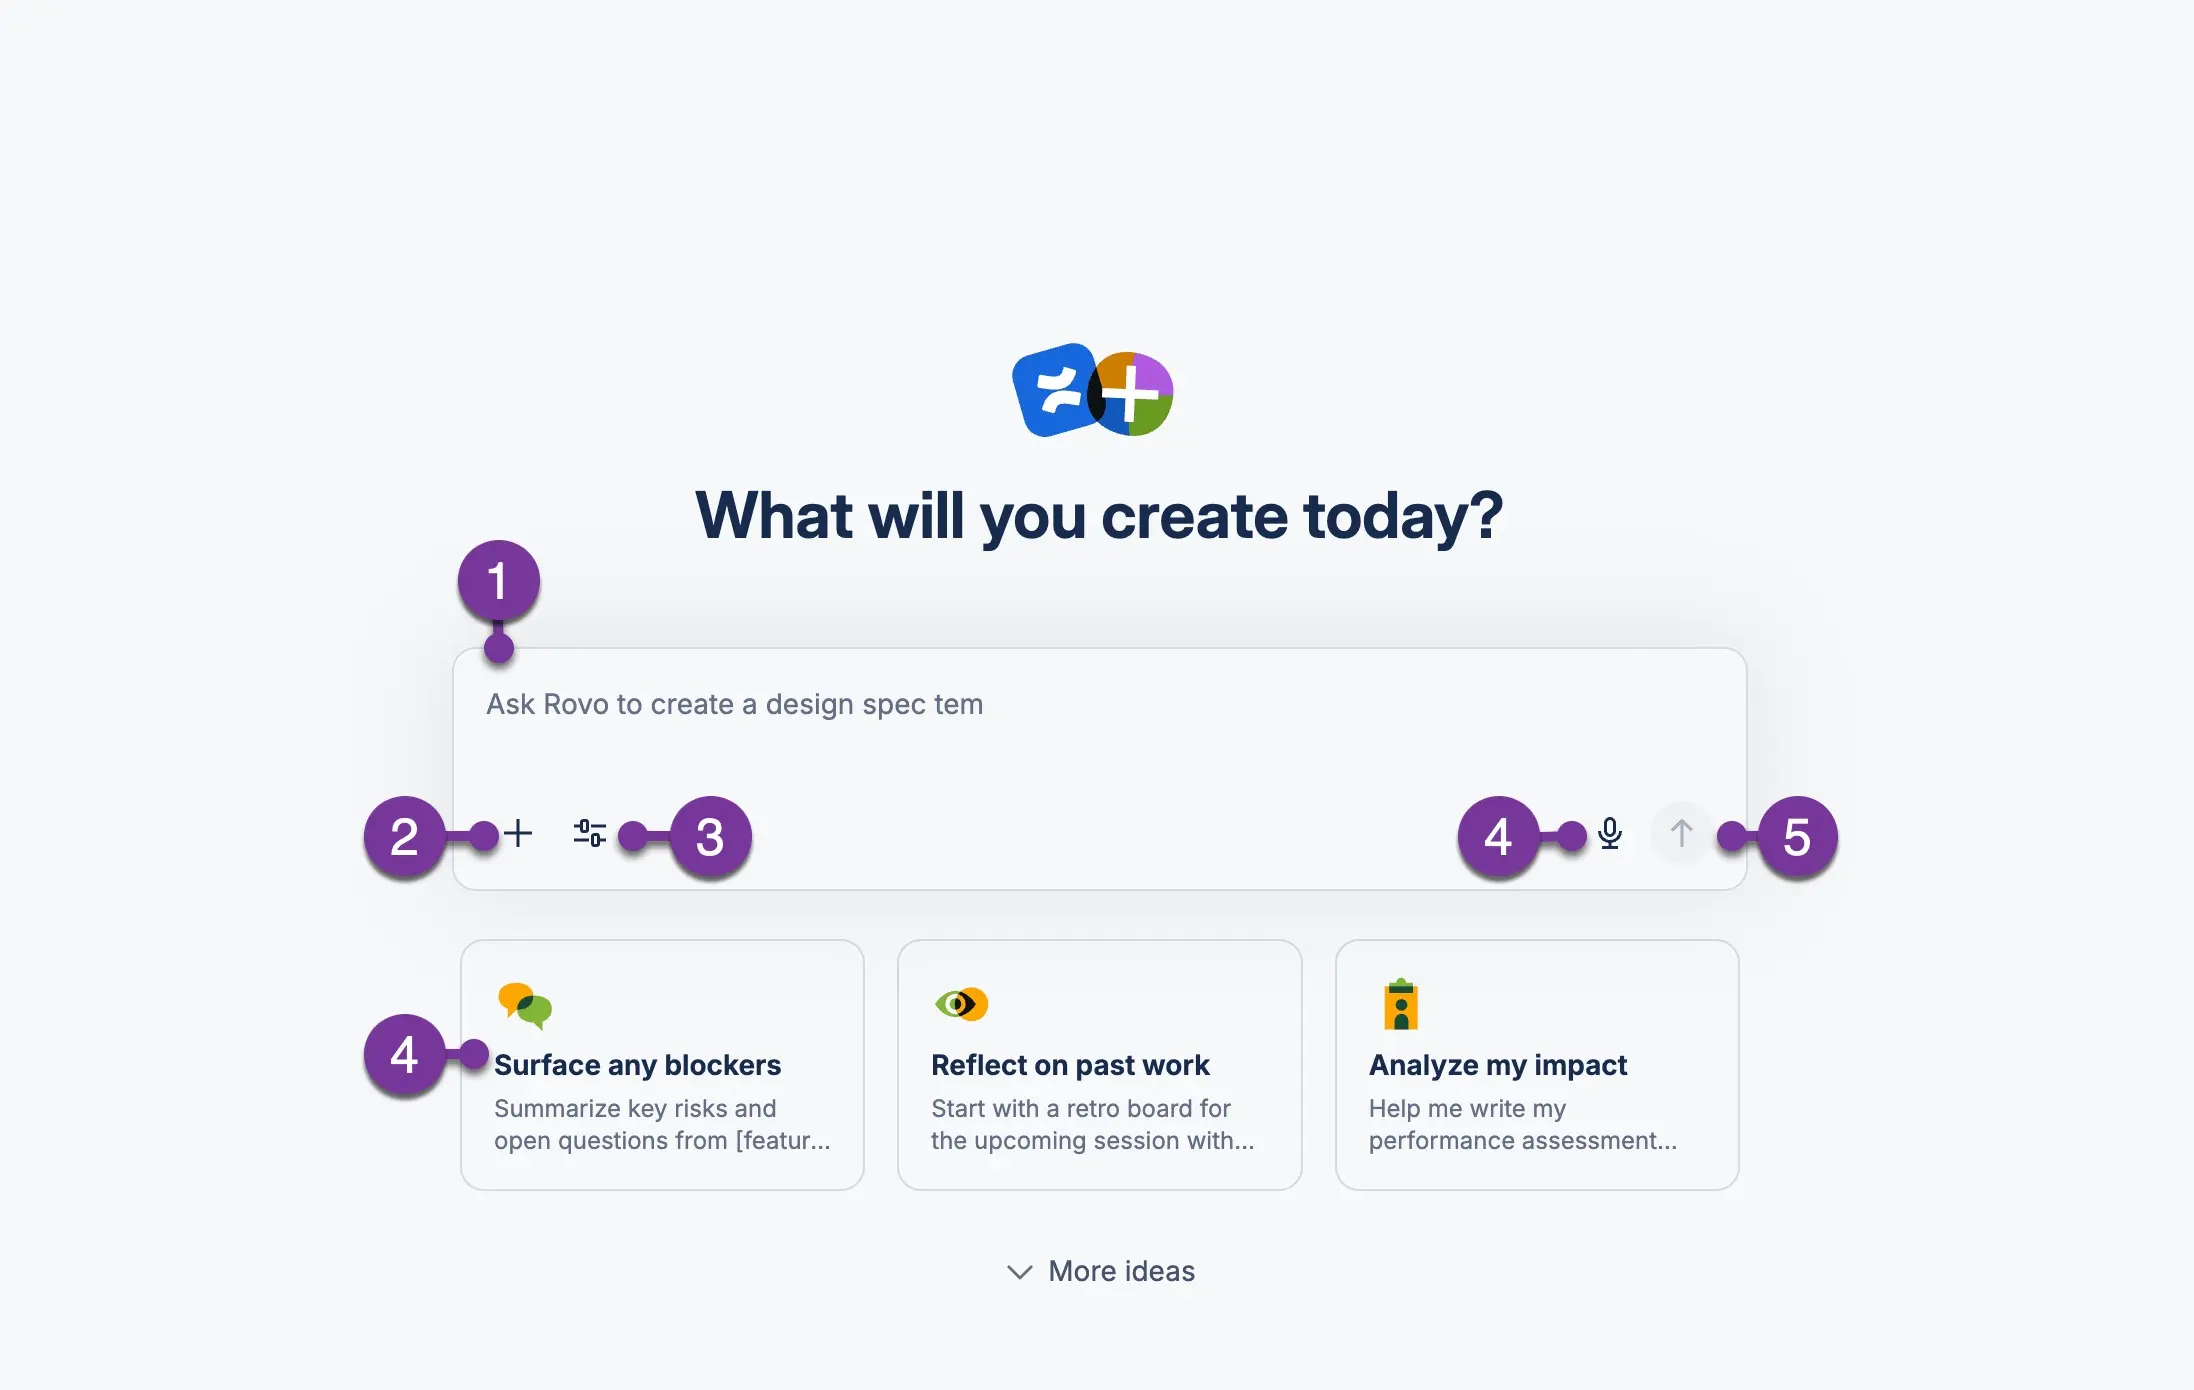
1. Start with a simple description of what you need. The more specific and clear your definition is, the easier you’ll make it for Rovo.
2. You can use the “+” to include additional context such as: attachments, links, a template, an @mention to a person, or any other format (like lists or quotes).
3. Adjust how Rovo will respond:
- Rovo’s Decision: Rovo will choose the reasoning that makes the most sense.
- Deep Thought: Rovo will take more time to provide solid answers.
- Deep Research: Rovo uses a multi-step approach and takes longer to try to give better answers.
- Include Web Results: Rovo will search the internet.
- Search Business Information: Rovo will search your linked applications like Jira, Trello, or Google Drive.
- Filter by Applications: Select which applications and integrations Rovo should use from those already existing in the company.
4. You can use the microphone to speak directly to Rovo and ask for what you need. You can use any of the prompt templates, so you don’t even have to type what’s needed.
5. Once you’ve added all the information and selected all the menus, you just have to click send.
Preview you newly created content
When you finally send your prompt, Rovo will start working on an initial draft of your content in the preview area, which takes up the whole screen. The preview area can contain written content or whiteboard elements, depending on your request.
Unlike when you create a Live Doc, a page, or a whiteboard, the content in the preview panel has not yet been added to any space. Only you can see it until you finally select the option: add to Confluence. Rovo will not publish anything on your behalf unless you have previously reviewed and validated the information for publication.
As soon as Rovo finishes drafting the content, you can edit it directly or use Rovo’s chat to tell it what changes you want to make or what information you feel is missing.
Explore Rovo's possibilities
Really, test everything you need without stopping. Because Rovo is incredibly powerful for generating content in Confluence.
If you’ve already deployed a new version: let Rovo generate the page with the Release Notes. It will take information from Jira, task comments, and make sure the page makes sense without missing a single comma.
If you’ve done an analysis after resolving an incident, let Rovo complete all the context: when the incident was opened, who participated, what the possible root cause is…
And one of my favorites is asking Rovo to generate whiteboards to visually display processes or steps for the team to follow.
For example: have it create a whiteboard explaining the onboarding process for new team members. This way, the HR team will have no doubts when following the steps for these new hires.
Still have doubts about what Rovo can do for you? Try all its power in Confluence and contact us if you need help integrating it into your organisation.
Our latest news
Interested in learning more about how we are constantly adapting to the new digital frontier?
Insight
April 27, 2026
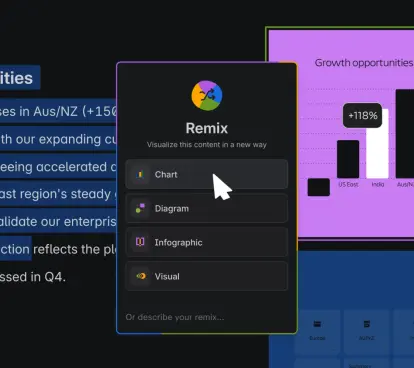
Remix with Rovo in Confluence: Transform Your Data into Visuals

Insight
April 13, 2026
What's New in Atlassian Goals: A Clearer View of Owners, Followers, and Labels

Insight
March 29, 2026
Jira Service Management Surveys: How to Create Advanced Satisfaction Surveys in Atlassian

Tech Insight
February 16, 2026
Atlassian Assets, now as a platform app