How to implement Jira Service Management Journeys
December 22, 2025
Today, the complexity of some activities within organizations requires the support of several teams to complete processes from start to finish. However, each area may have its own subprocesses and work environments in different spaces. It was precisely because of this that Atlassian introduced the new journeys in Jira Service Management.
Journeys give us the ability to build end‑to‑end processes that connect different work items spread across multiple software (Jira) and service (Jira Service Management) spaces, creating a continuous experience that lets you see all the work required to complete a process and the relationships or dependencies between the different work items.

Do you want to know how to create a Journey?
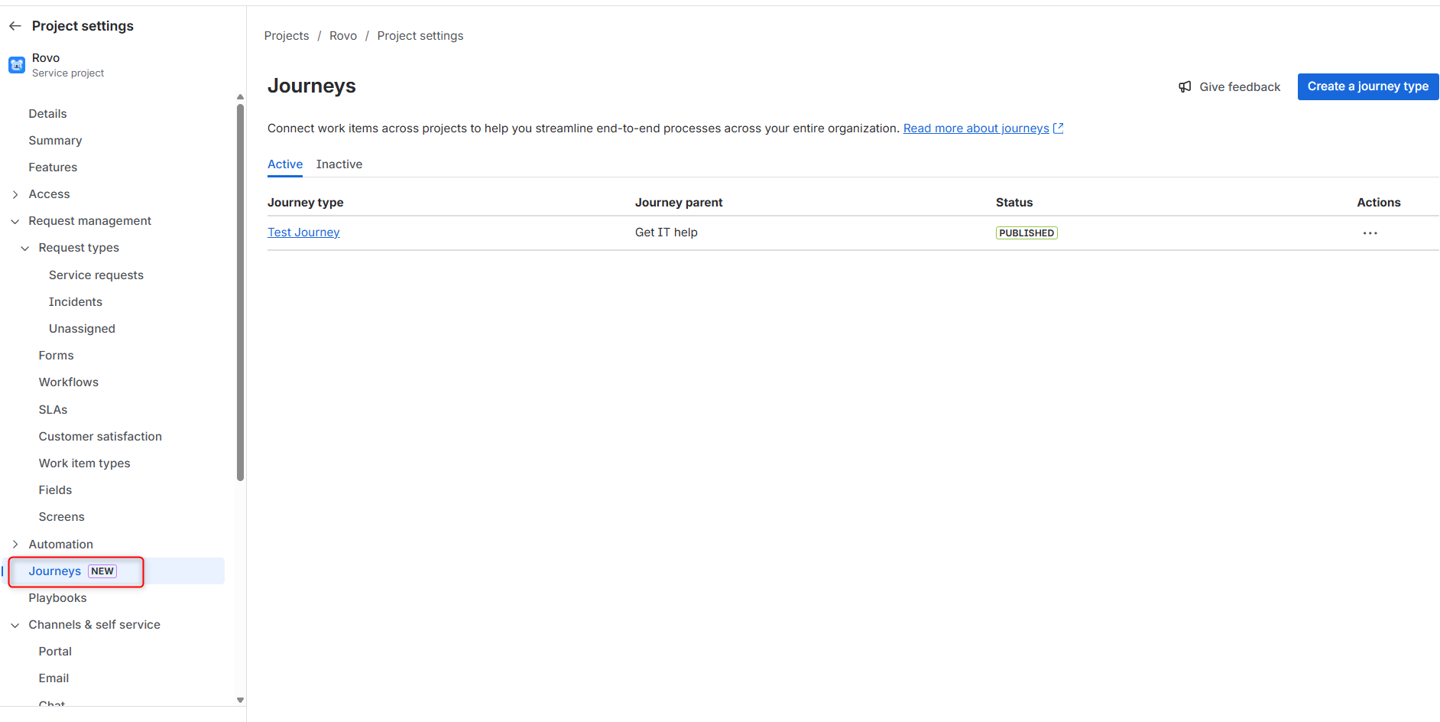
To create your own Journey, you need to go to the settings of the Jira Service Management project you’re working in. In the left‑hand side menu you’ll find the “Journeys” option.
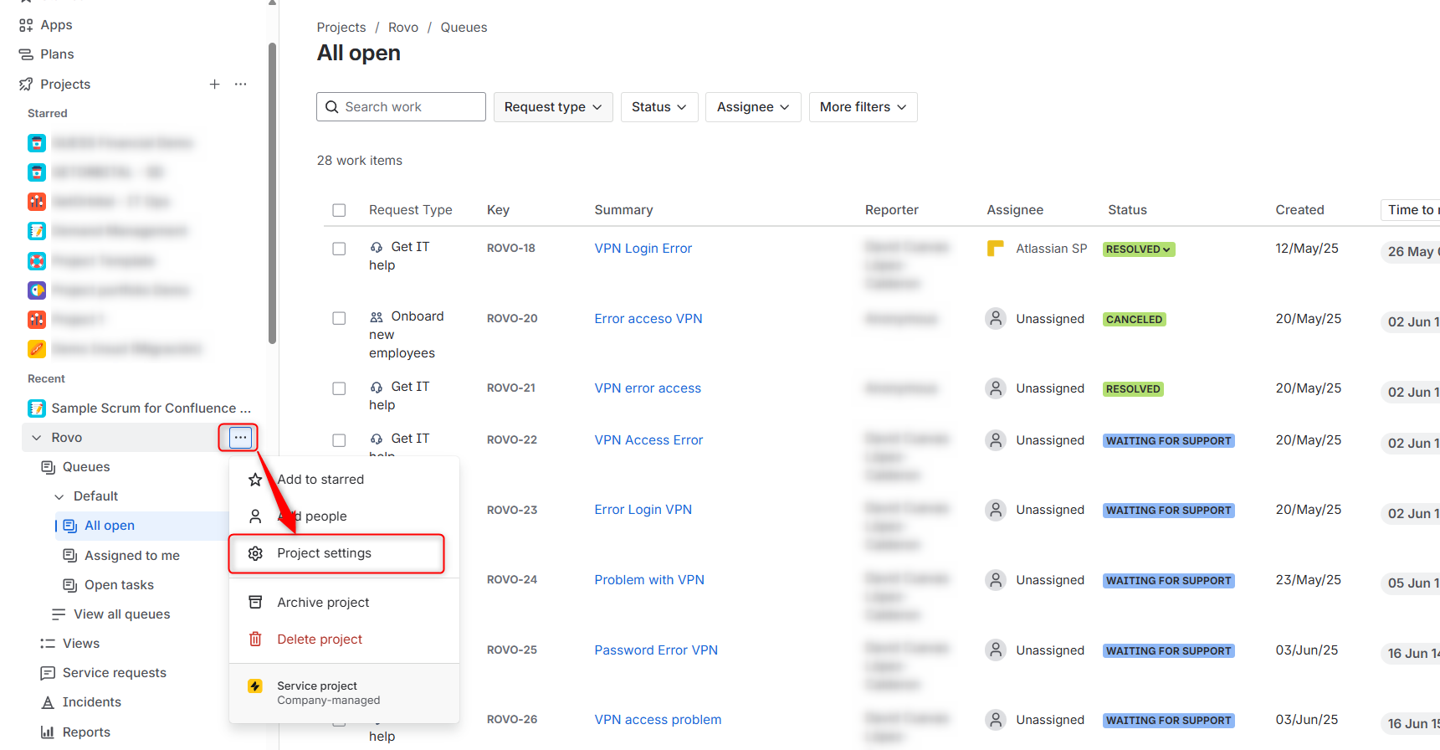
If you don’t see this option in your project, then check the Features menu. The ability to create Journeys must be enabled.

Inside the interface, you’ll need to select the create a journey type option and fill in the fields requested:

- Journey type name: the name you’ll give to the process you want to create so you can quickly identify it.
- Journey parent: you’ll see the list of request types you have in the project, and you’ll need to select the one that will trigger the journey.
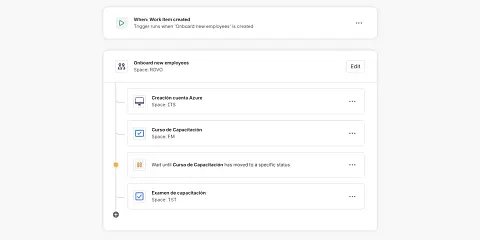
In this example, we want to create a process where the organization registers new employees, and those employees need to be provided with the necessary equipment and enabled in multiple systems, so several teams are involved in the process. For that reason, the onboard new employees request type is selected.
In the editing interface, you’ll be able to see different elements that you can edit and adapt to your process.
Trigger and Start Condition
If you’ve already configured automation rules, the process from here on will feel familiar 😉
Start at the beginning: what will be the trigger for your journey? At what moment will it run?

Currently, there are two triggers, and the one we’ll use most often and in this example is work item created.
Within that trigger, you’ll also see the option to add conditions.
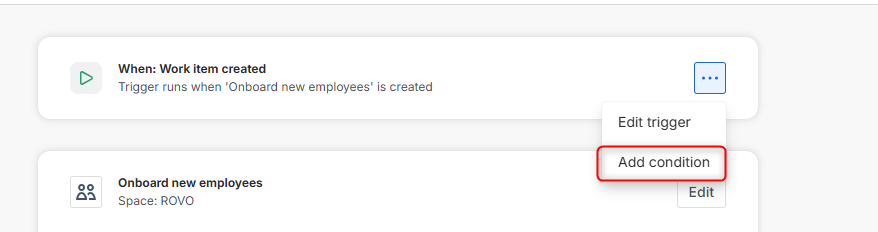
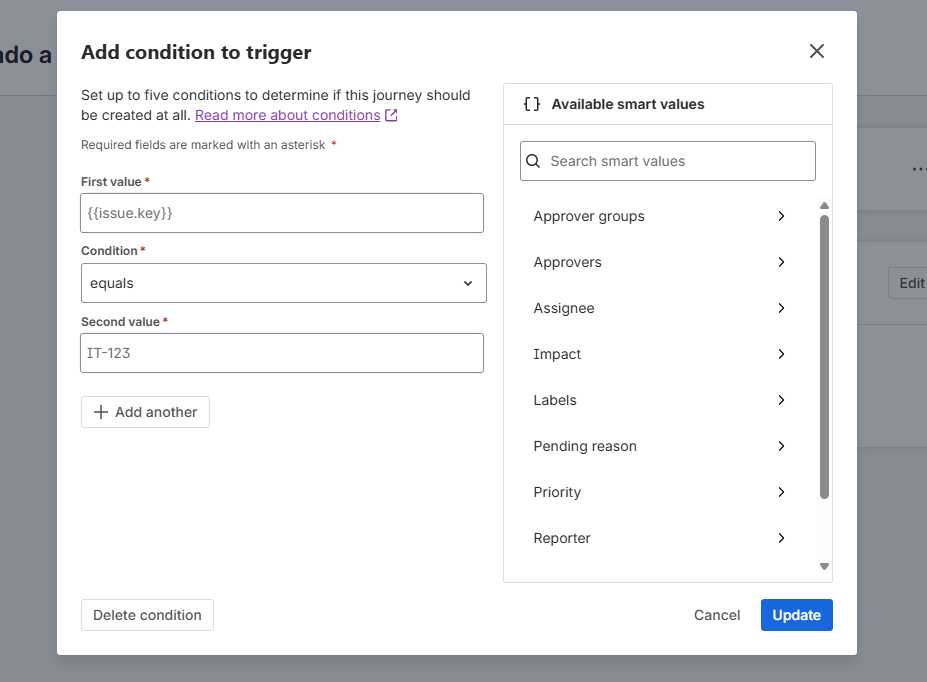
We can decide when the journey will be activated, based on ‘smart values’. We just have to select the value we want (from the available options) and drag it to the configuration.
When including the ‘First value’, we will have to decide what type of condition we want to apply: is equal, is not equal, begins with... and within the second value we enter what we are comparing it with.
This can help us create more specific use cases that are more aligned with the operation of our processes. For example, when registering new employees who are outside the country, we may need to perform a more specific activity.
Adding activities within the Journey
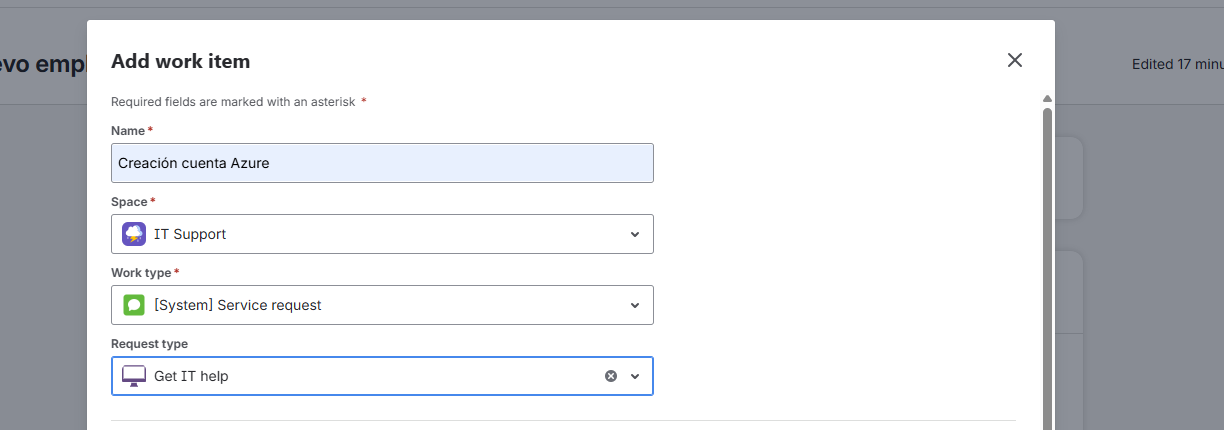
Once we’ve defined the condition, we’ll start adding the different tasks we want to be completed as part of the process.
To add a task, we’ll need to set various parameters that will help create the activity in the right project and with the necessary information. We’ll need to add information such as the name (different from the Summary), the project where we want to create the task, and the type of work we want to create (if we select a Jira Service Management project, we’ll be able to select a Request Type). These tasks can be created in any type of Jira or Jira Service Management project. And we can create as many tasks as we want.
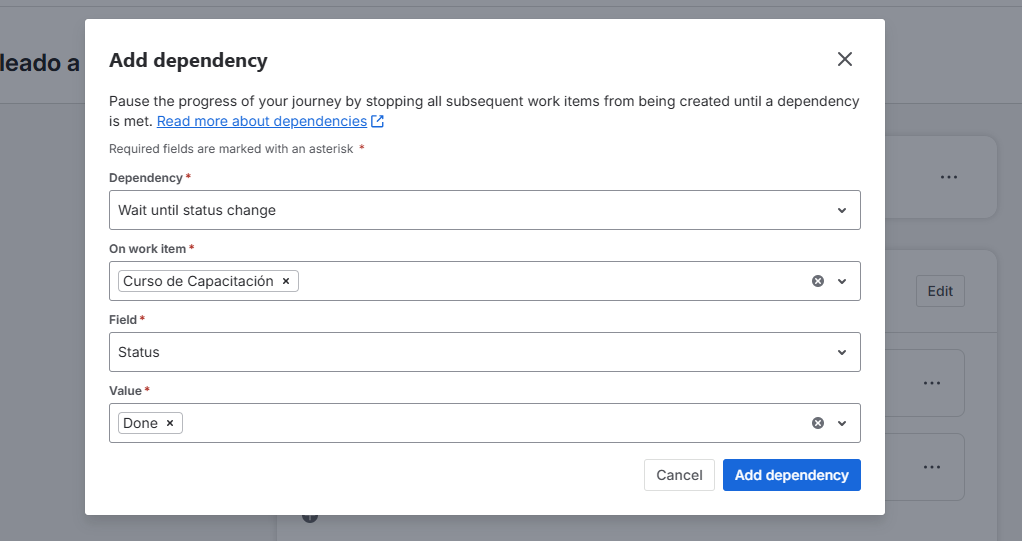
One of the key features within journeys is the option to add dependencies, because it lets us indicate when we want certain activities to start. When we select add dependency, an interface appears where we need to select how we want the journey to behave:
-
Dependency: choose to run when a certain status is reached (this is currently the only option available).
-
On which task: choose which of the previously created tasks the wait should apply to.
-
Field: we’ll have two options: the first is based on the status of the activity, and the second refers to the status category (To Do, In Progress, Done).
-
Value: this is where we select the status we’re waiting for.
Within the journey, you’ll see how elements are put “on hold” when a dependency exists.
We can add conditions to decide under which circumstances tasks are created within the journey. You’ll need to use smart values to perform the comparison.
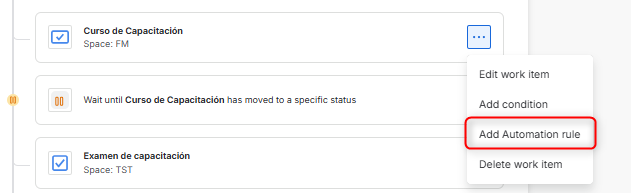
Similarly, we’ll be able to create automations that run within a journey. Just select the option and enter the name of the automation. Once that’s done, a template will open with preconfigured conditions ensuring that the automation only applies to that specific Journey.
Publishing and managing the journey
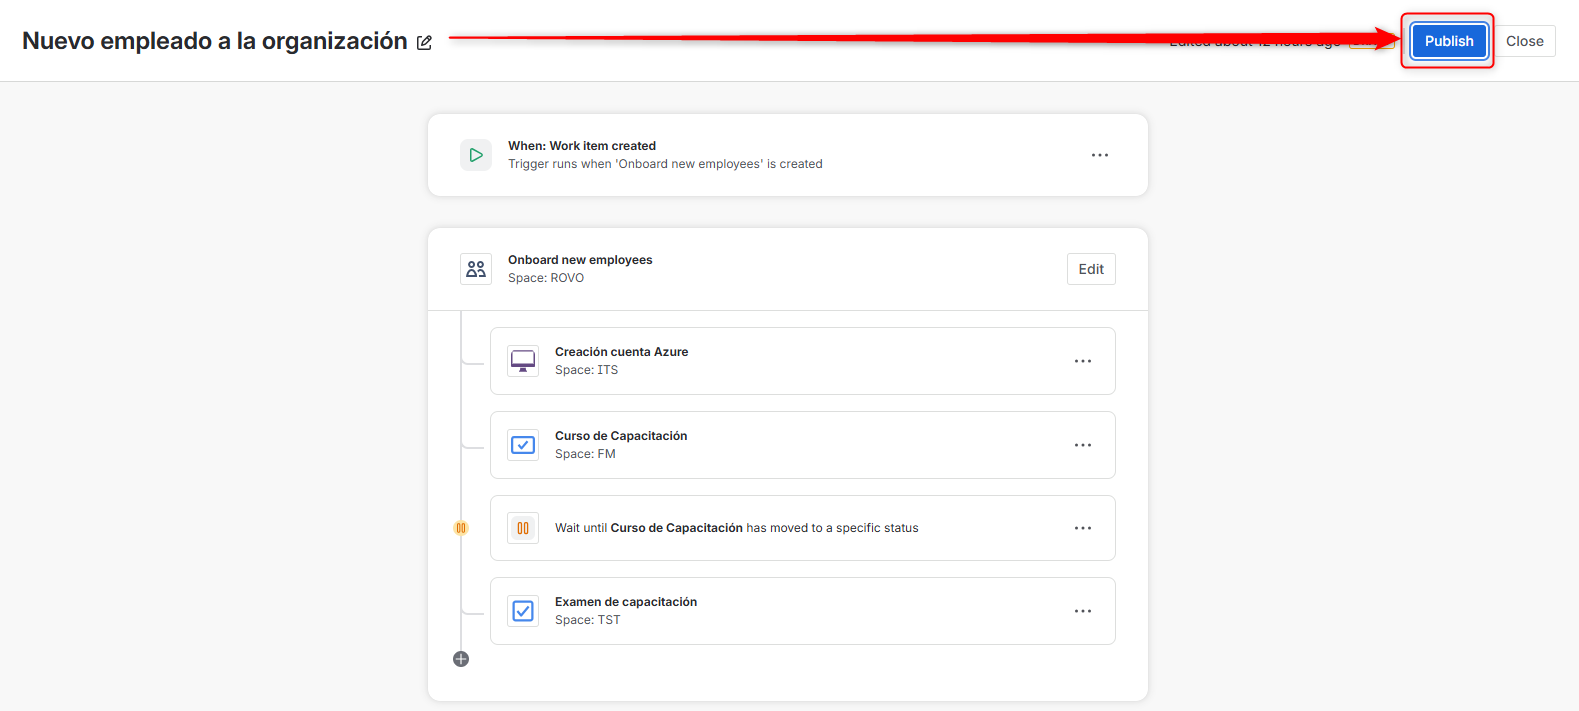
Once we’ve finished defining the newly created journey, we’ll publish it using the option at the top‑right. After selecting it, a confirmation message will appear, and in this way we confirm the creation of our first journey.
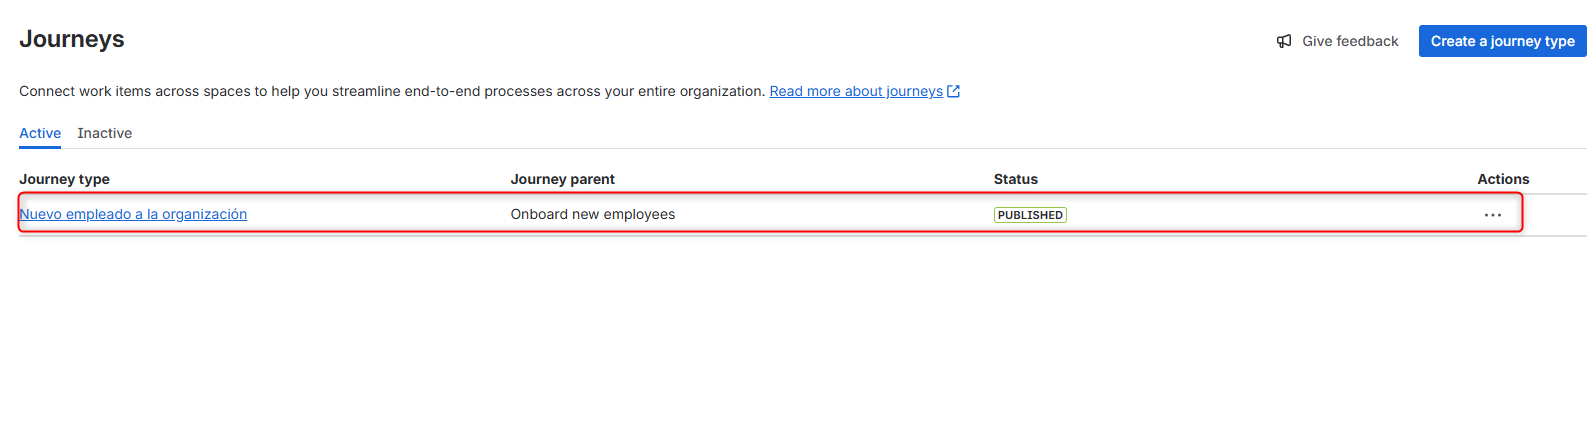
We’ll see our journey in the list and it will appear with the PUBLISHED status.
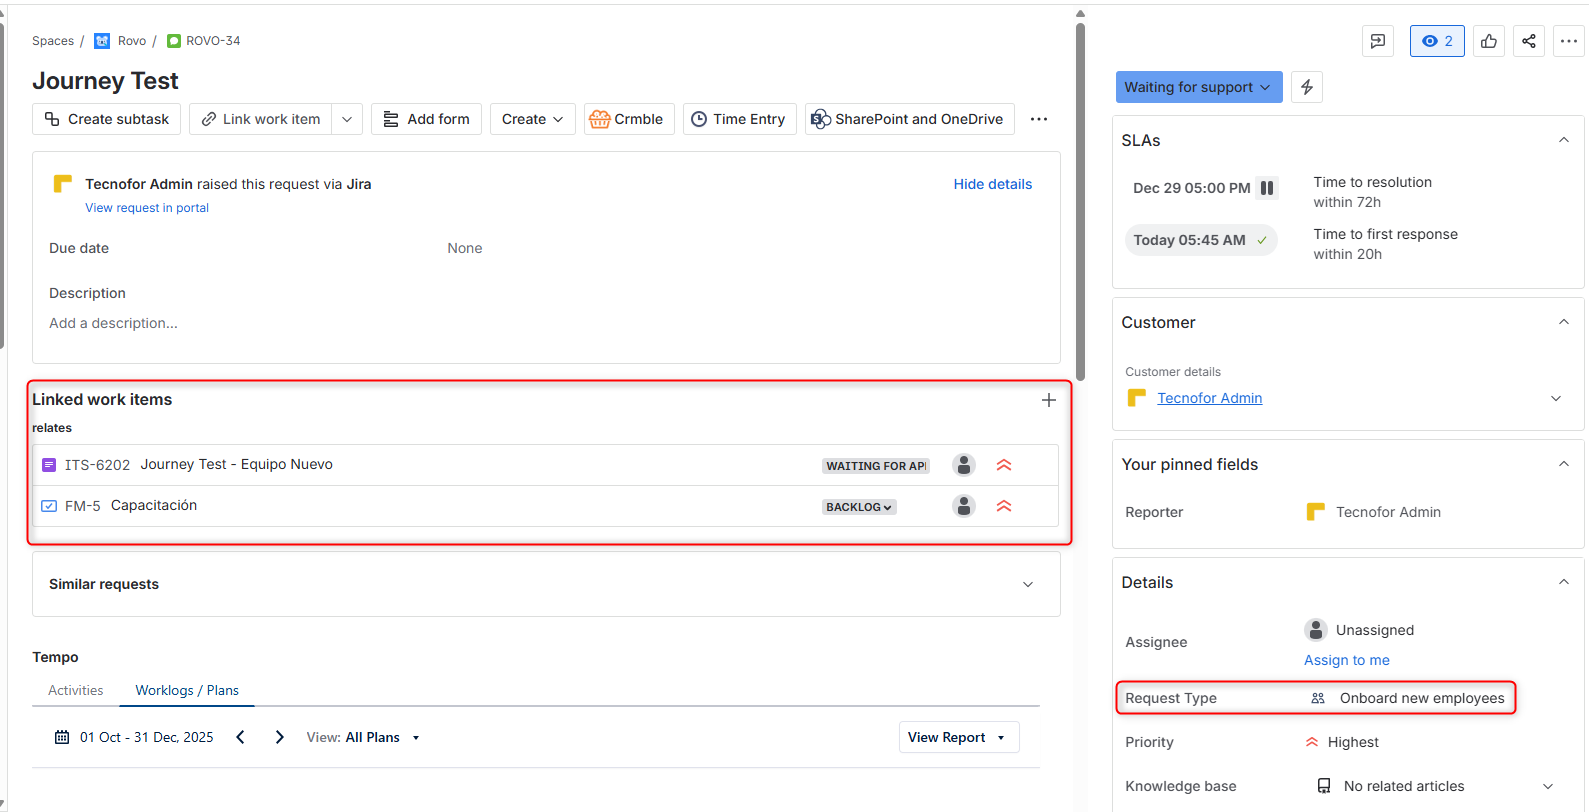
We’ll see that if we create a ticket of the onboard new employees type, it will automatically create and associate all the tasks we’ve defined, in any of the configured projects.
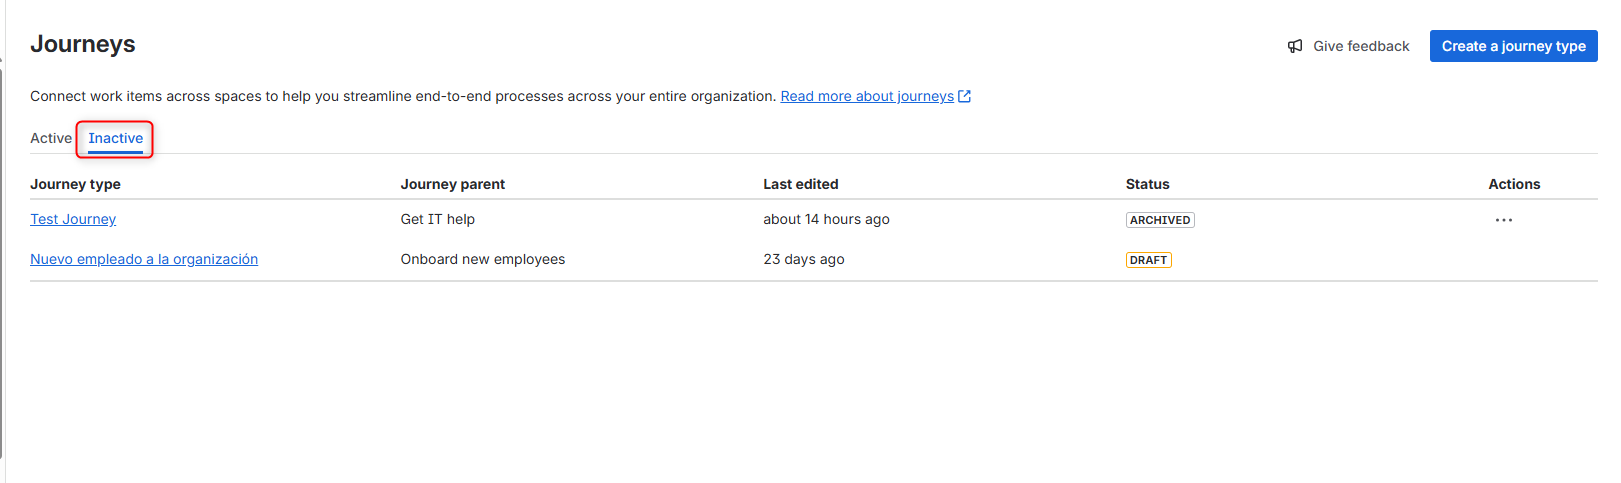
In the inactive tab we’ll find journeys that are in draft or archived status (we can archive journeys by selecting the option, and similarly, if we’re editing a journey and we don’t publish it, it will move to draft status).
And now that I’ve created a Journey?
You’ve created your Journey, it’s working correctly, but now you want to extract specific information about this new process you’ve activated in your instance.
Keep in mind that a Journey is still a complex automation built through a very simple interface. That means that in the Automation module you can access executions, the audit log, check if there were any errors, and so on.
Even better, you can also search via JQL for the tasks that have been created as part of a Journey.
Some examples:
-
Journey: search for all tasks that were created during the execution of the journey
(Syntax:journeyID_ )_ -
Journey Parent: search only for the tasks that trigger all the others
(Syntax:journeyParentOfTypeId_ )_ -
Journey Type: search for all tasks that were created in a specific journey
(Syntax:journeyTypeId_ )_ -
Journey Type Version: search for all tasks that were created during the execution of the journey in a specific version
(Syntax:journeyTypeVersion = 1_ )_ -
Journey Work Item ID: search for the specific task created within the journey
(Syntax:journeyWorkItemId_ )_
A little trick to extract these values is to use the Journey Type ID. It can be found in the URL when you select the journey to configure:

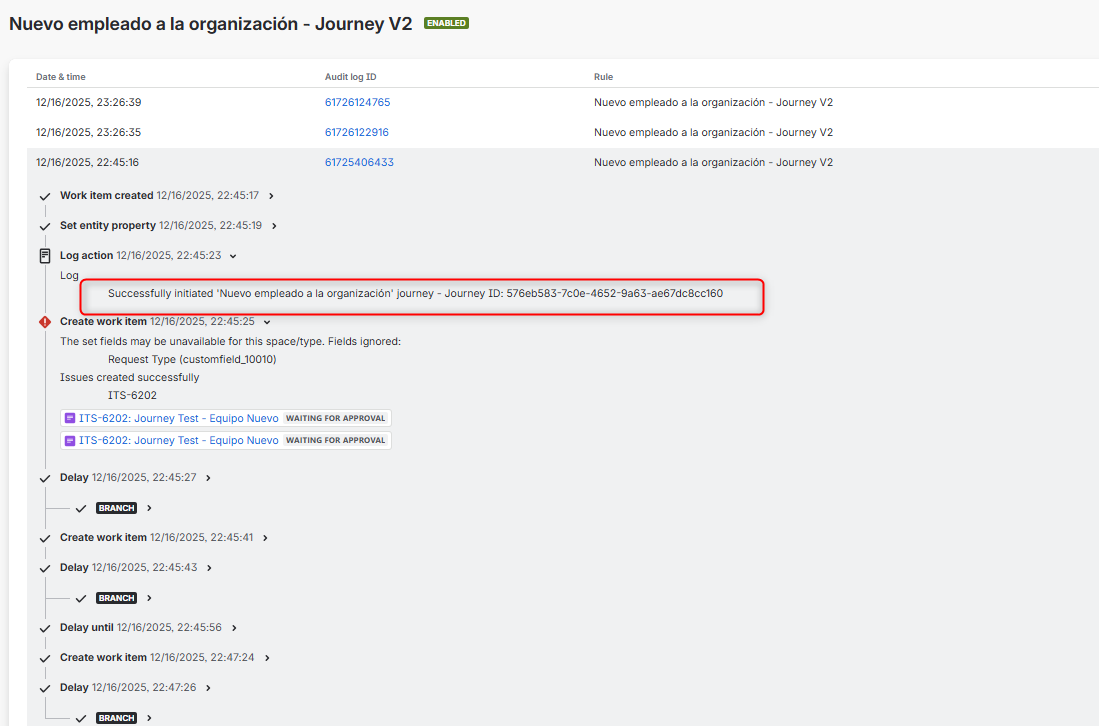
With Journey ID, it appears located within the Automation Audit Log:
Some conclusions
-
Journeys allow us to bring to life processes that require the involvement of several areas, letting us create activities in specific projects so everything is better organized.
-
They offer a simple and intuitive interface where you can configure the different conditions and actions that will be executed.
-
They allow custom searches on journeys and the activities that make them up.
-
They provide clear traceability, since you can view the execution log in the Automation module.
These are some things that could be improved for the global launch in 2026:
-
JQL searches can be confusing and the information can be difficult to obtain.
-
The automations that are created are hard to understand and maintain, since they don’t stay in sync with changes in the journeys.
Our latest news
Interested in learning more about how we are constantly adapting to the new digital frontier?
Insight
April 27, 2026
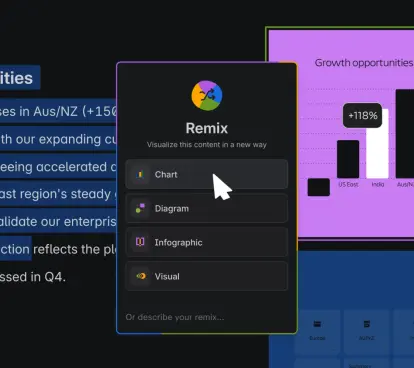
Remix with Rovo in Confluence: Transform Your Data into Visuals

Corporate news
April 21, 2026
We have integrated AMS Solutions to strengthen our capabilities in managed services and AI-assisted software development

Insight
April 13, 2026
What's New in Atlassian Goals: A Clearer View of Owners, Followers, and Labels

Insight
March 29, 2026
Jira Service Management Surveys: How to Create Advanced Satisfaction Surveys in Atlassian