
Sandbox: an environment where you can experiment and test changes before deploying them to production

September 1, 2025
Discover what it is, its advantages, and how to create one ⬇️
What is a "Sandbox"?
In Atlassian Cloud, a "Sandbox" refers to a development and/or testing environment that is isolated and separate from the main production environment. The goal is to test new configurations, customizations, and applications without negatively affecting the production system.
Currently, it is a feature offered with Premium and Enterprise licensing for all applications with this licensing level in the instance. This means if we have Jira, Jira Service Management, or Confluence with Premium or Enterprise licenses, we can create a Sandbox instance for each of these products. There is no charge for this instance, but keep in mind that all additional Marketplace Apps included in this environment will be billed according to the manufacturer's policy.
Advantages of a Sandbox
In case you're not sure how having a Sandbox can benefit you, here are the main advantages:
-
Production instance copy: We can make an exact copy of our production Jira at any time.
-
Testing security: A Sandbox provides a safe and isolated space to test changes without the risk of affecting data or processes on the production platform, thus avoiding interruptions.
-
Configuration development: Development teams can test new configurations, workflows, automation rules, and customizations in a pre-production environment before implementing them in production. This helps reduce errors and ensures that the configurations are effective.
-
Application evaluation: They allow for testing new applications and add-ons without affecting the production instance. This helps teams make informed decisions about which tools are best suited for their needs.
-
Training capability: These environments can also be used to train new users or provide training on Atlassian tools without risking production data.
-
Risk-free experimentation: Teams can experiment with new ideas and approaches without the impact of negative consequences in production. This will encourage innovation and continuous improvement.
If you read to the end of the article, you will also see a series of limitations or drawbacks that are important to review.
How to create a Sandbox
In any case, our recommendation is to use this resource that Atlassian provides, and that's why we want to show you exactly how to create a Sandbox and how to configure it.
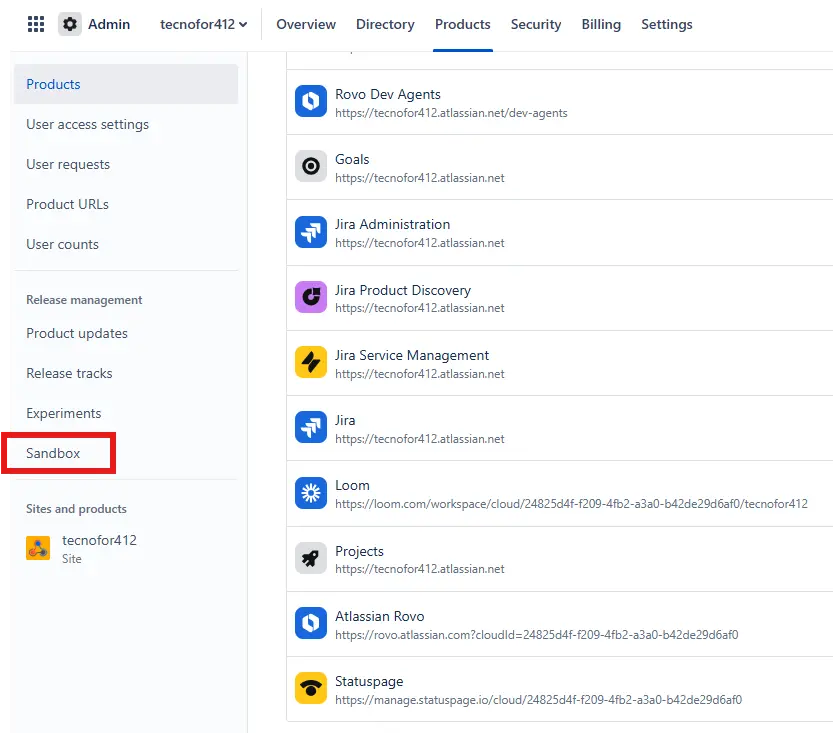
To do this, you need to have site administrator permissions and access admin.atlassian.com
In the left-hand menu, you will see a “Sandbox” section.
Administrator permissions are required, and within the Products section, on the left menu, "Sandbox".
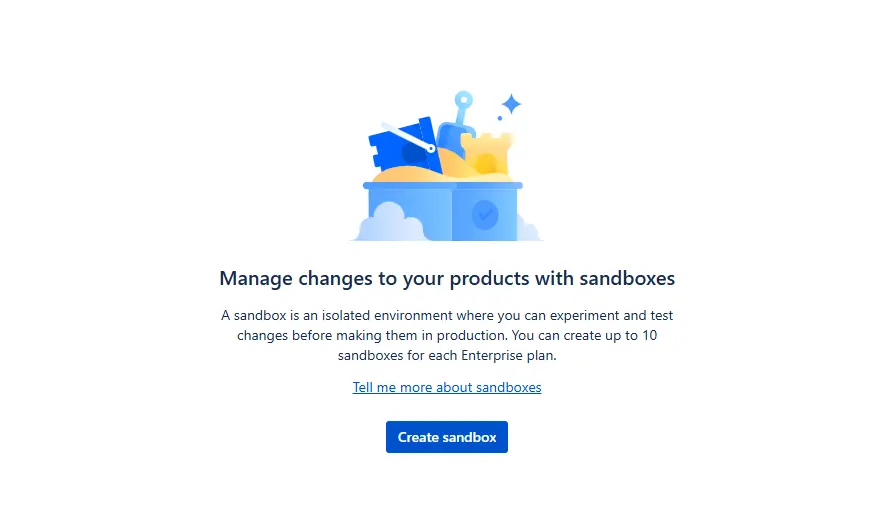
The page itself will show you the button to create a new Sandbox.
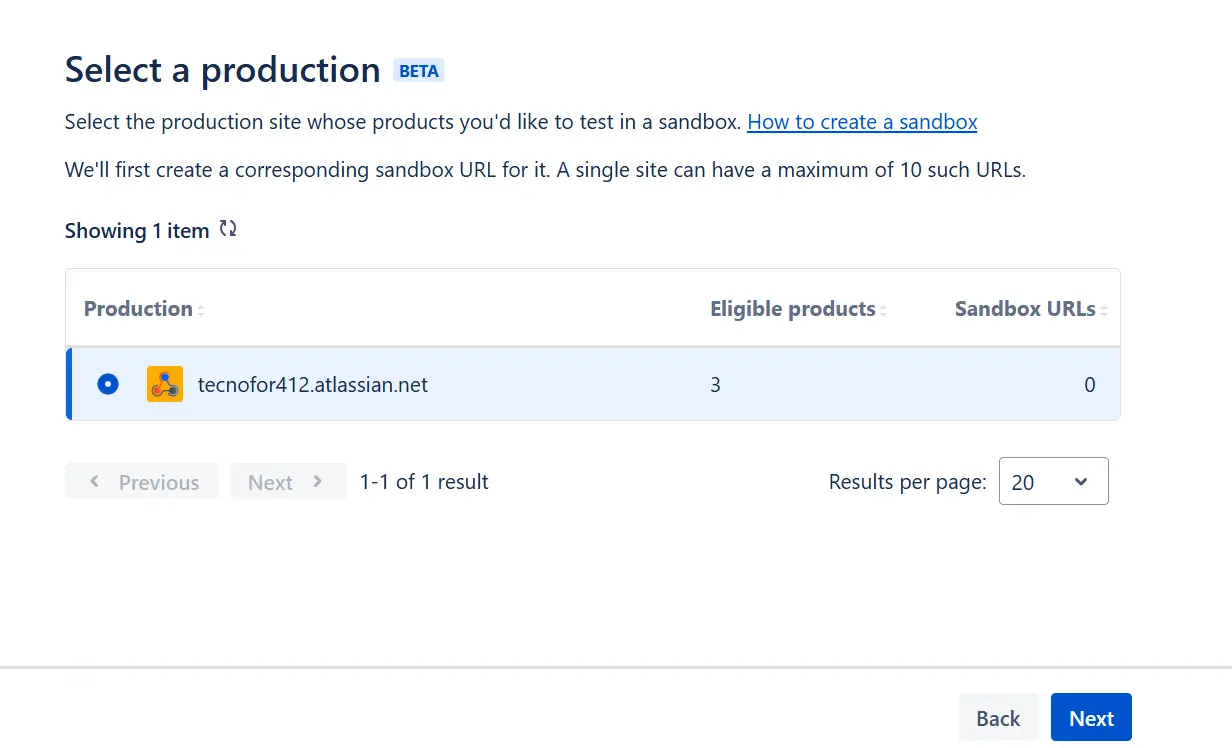
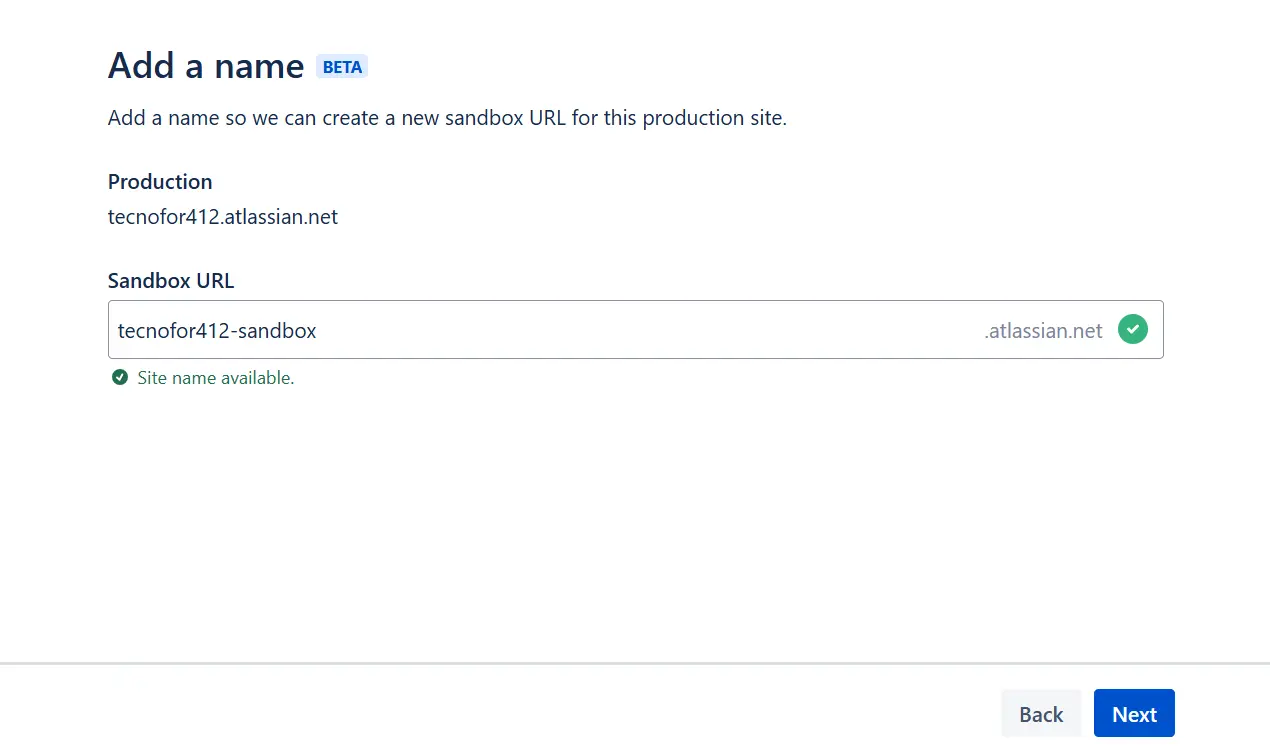
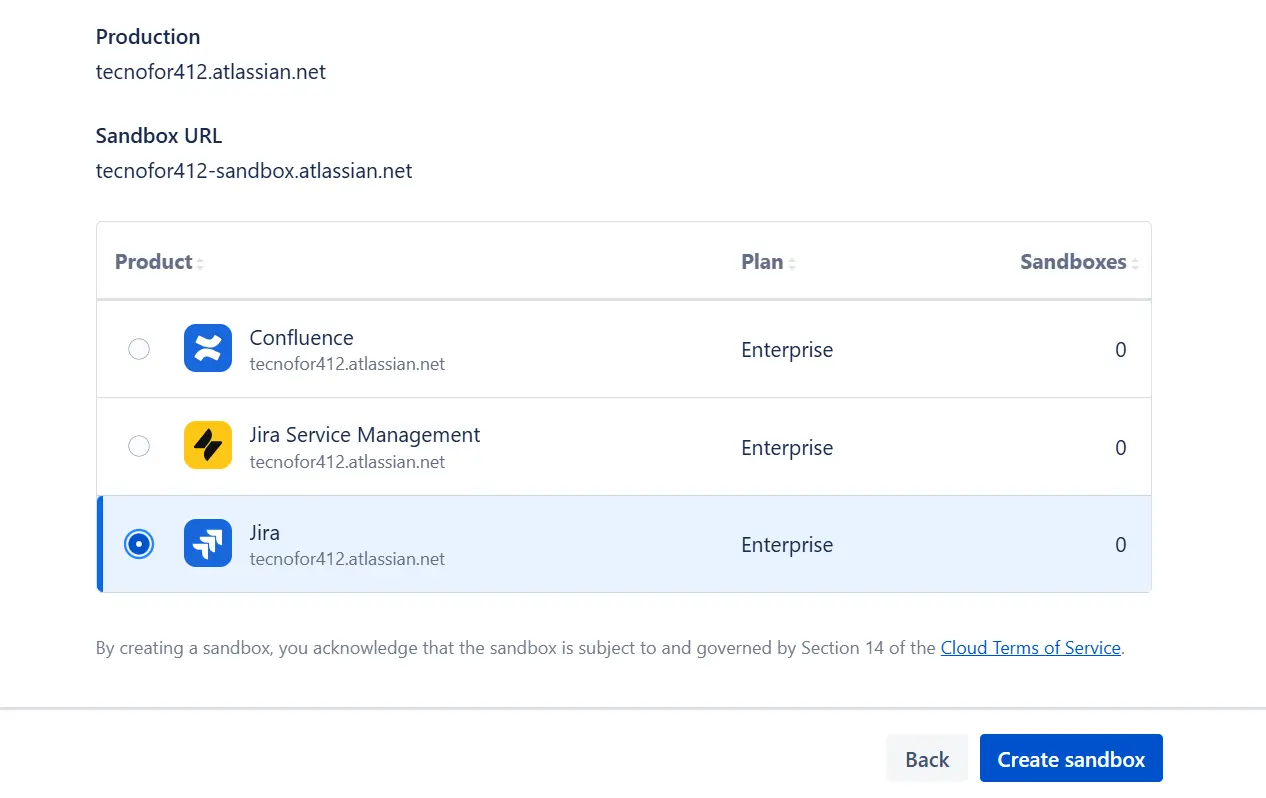
Keep in mind that when creating a Sandbox, you are actually creating a new instance with its corresponding URL. That's why Atlassian asks you to confirm this information before creating the environment:
You will be able to select which applications you want to activate in the Sandbox:
In a matter of seconds, the Sandbox will be generated. You will receive an email confirming access as soon as it is ready to use:
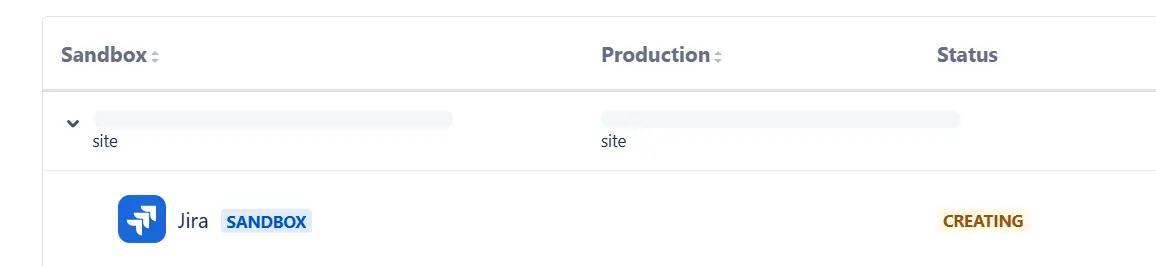
Its status will change from “Creating” to “Online”
Now, it's important to specify what data you want to transfer to the Sandbox and to know exactly what data is not copied automatically. As we mentioned at the beginning, you can do a full instance data dump, or select a part of the instance to copy. Here is some relevant information to consider:
📡 Full data dump from production instance to Sandbox (what is copied and what is not)
| ✅ Data that is copied to a Sandbox | ❌ Data that is not copied to a Sandbox |
|---|---|
Jira, Jira Service Management, and Jira Product Discovery data:
|
Jira, Jira Service Management, and Jira Product Discovery data:
|
🛰️ Specific data dump from production instance to Sandbox (what is copied and what is not)
| ✅ Data that is copied to a Sandbox | ❌ Data that is not copied to a Sandbox |
|---|---|
|
✅ Users and groups: From active and inactive directories, Jira Service Management users, including agents (agents are copied in an inactive state to prevent security breaches). ✅ Project types: Archived projects (Restore them before copying), Jira Service Management projects, and team-managed projects. ✅ Data in work items: Summary, Description, Work type, Status, Priority, Resolution, Labels, Reporter, Assignee, Due date, and Subtasks Some custom fields: Text, Date, Number, Time, Labels, Select list (single choice), Checkbox, Radio button, and User picker (single, multiple) Group custom fields, Multi-line text, Environment, @mentions, Watchers and votes, Issue links (including link types), Attachments (media, files), Comments, Comments with security, Story points, Time spent, and Issue. ✅ Jira project data: Work item rank, Epics (epic link, name, color, status, Issue rank), Original Estimate, Remaining Estimate, Flagged, Components, Environment, Sprints, and Versions (affects versions, fix versions). Boards linked to a single project. Boards: Name, Administrators, filters and permissions, shared permissions, and location. Advanced board settings: Column names, statuses, status mappings, quick filters, card colors, and subqueries. ✅ Project setup: Workflows. Validators: Required fields and field changes. Conditions. Post-function. ✅ Apps: Nothing is really copied, but it's also true that it doesn't uninstall all the Apps you already have installed in the Sandbox, unlike when we perform a full environment copy. Confluence ✅ Users and groups ✅ Space types (If you select them): Active, archived, and personal spaces ✅ Confluence space data: Details: Logo, Name, Key, Categories, Description, Sidebar configuration, Content status configuration, and Space permissions. Appearance: Themes and space templates Page layout: Header and footer, and PDF export customization. Pages and blogs (including archived and those in the trash). ✅ Page/blog data: Title, Content (including history), Labels, Restrictions, Comments (including history), Attachments (including history), Likes, Page restrictions, Links are migrated, but some links on the destination site will still link to the source site, Page statuses, Stock Unsplash images in headers. |
❌ Users and groups: Jira Service Management users (only Jira Service Management agents are migrated) Users and groups from inactive directories (to migrate inactive directories, activate them before migrating) ❌ User profiles: User avatars (users will need to update their avatars after migration). Passwords (unless you have configured SSO, users will need to reset their passwords after migration). Timezones (timezone information on a per-user profile will be lost) ❌ Project types: Jira Service Management projects, Team-managed projects, Archived projects (to migrate archived projects, you must restore them first) ❌ Jira Boards: Boards linked to more than one project, and shared permissions ❌ Project configuration: Some custom fields: Single and multiple version picker, URL, Select list (cascading), Select list (multiple choice), Project picker), Custom field language translations. Workflow functions. Condition: Subtask blocking Post function: Clear field value, Copy value from another field, Delegate, Update custom field edit. Notification schemes (projects are added to the default schemes in the cloud) Project avatars, Links to non-migrated issues or entities, Automation rules, Custom issue type icons. Confluence ❌ Users and groups: Permission settings associated with groups will be lost during import. ❌ User profiles: User avatars (users will need to update their avatars after the data copy), Passwords (unless you have configured SSO, users will need to reset their passwords after the data copy). ❌ Apps: Applications and application data stored with the vendor (to copy app data, contact the corresponding Marketplace partner), team calendars. ❌ Confluence space data: Analytics data, Space shortcuts, Related pages settings, Whiteboards, Space icon (when the attachments toggle is off). ❌ Page or blog data: Analytics data, Reactions, Custom uploaded images in headers, Custom page statuses, Custom emojis (on page and in title), Public links (will need to be regenerated). ❌ Entities and permissions: Site-level settings: Configuration (General configuration (e.g., timezone, language) Additional configuration, Languages, Shortcuts, Global templates, and Code macro administration. Security: Security settings, Global permissions, Default space permissions. Look and Feel: Themes, Color scheme, Site logo and favicon, Header and footer, and Default space logo. Administration: Audit log, Application links, and Application navigator. |
How to perform the specific copy from production to Sandbox
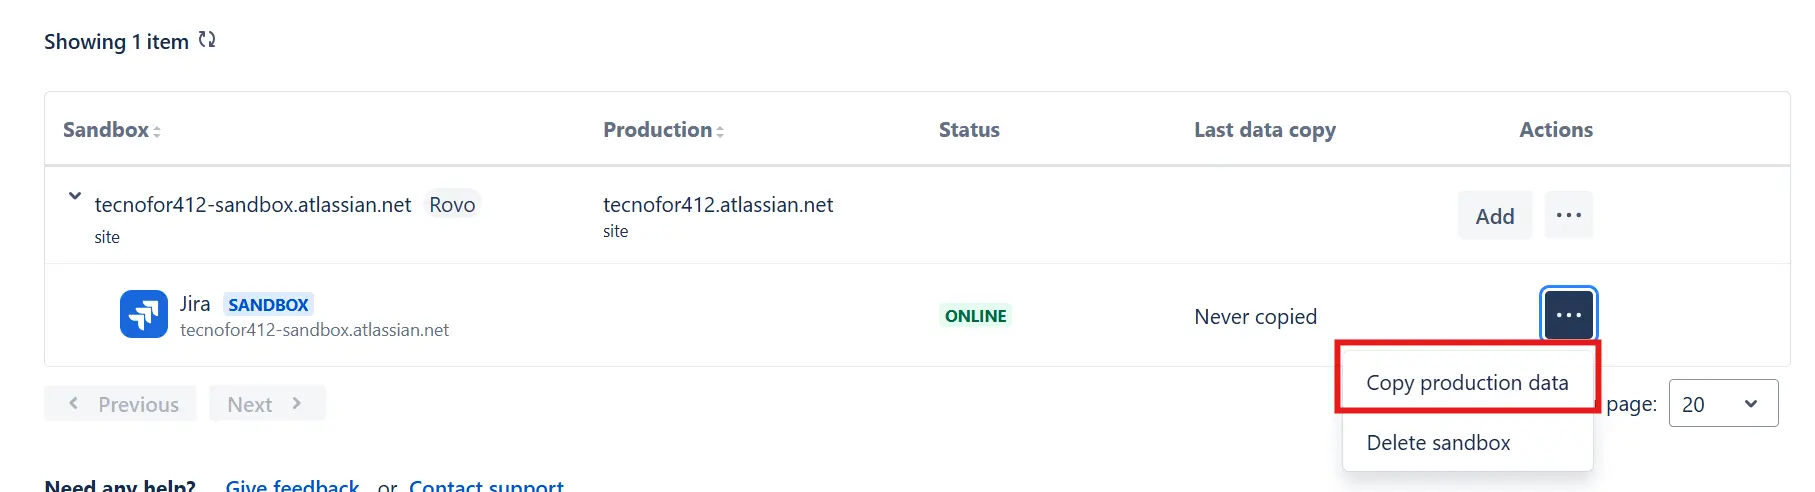
We will go to the administration section to perform a data copy.
We will check the specific project option:

And we will check the projects we want to copy.
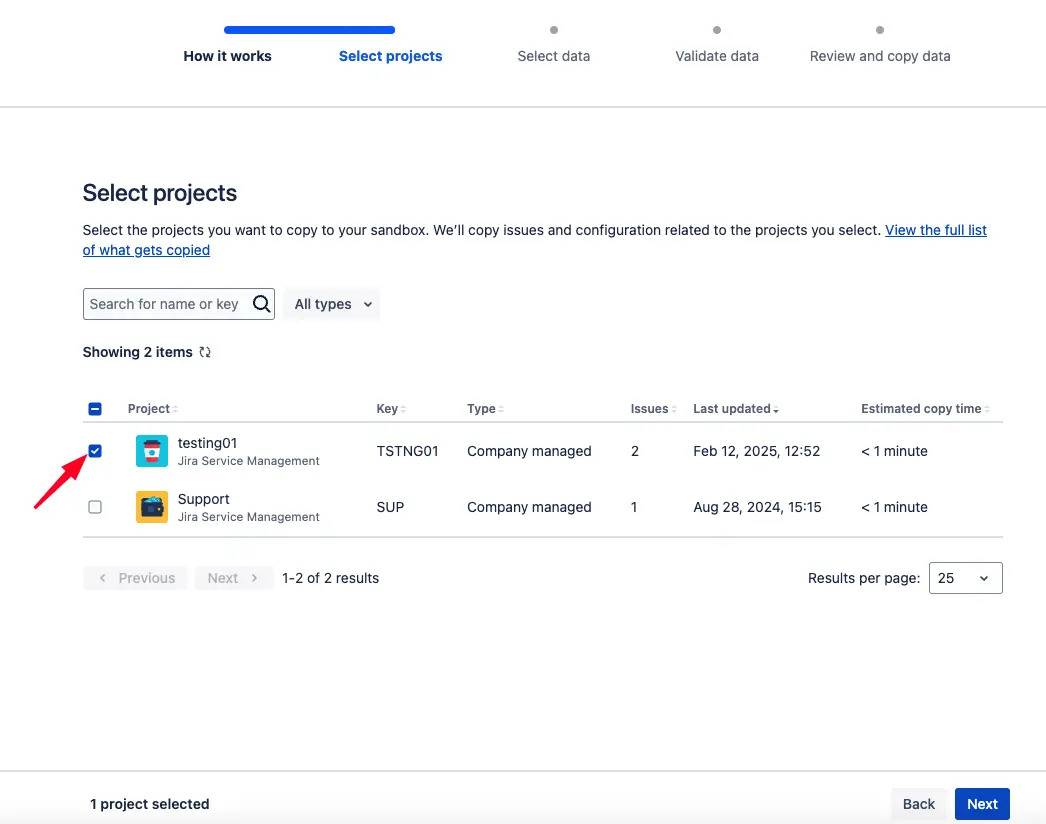
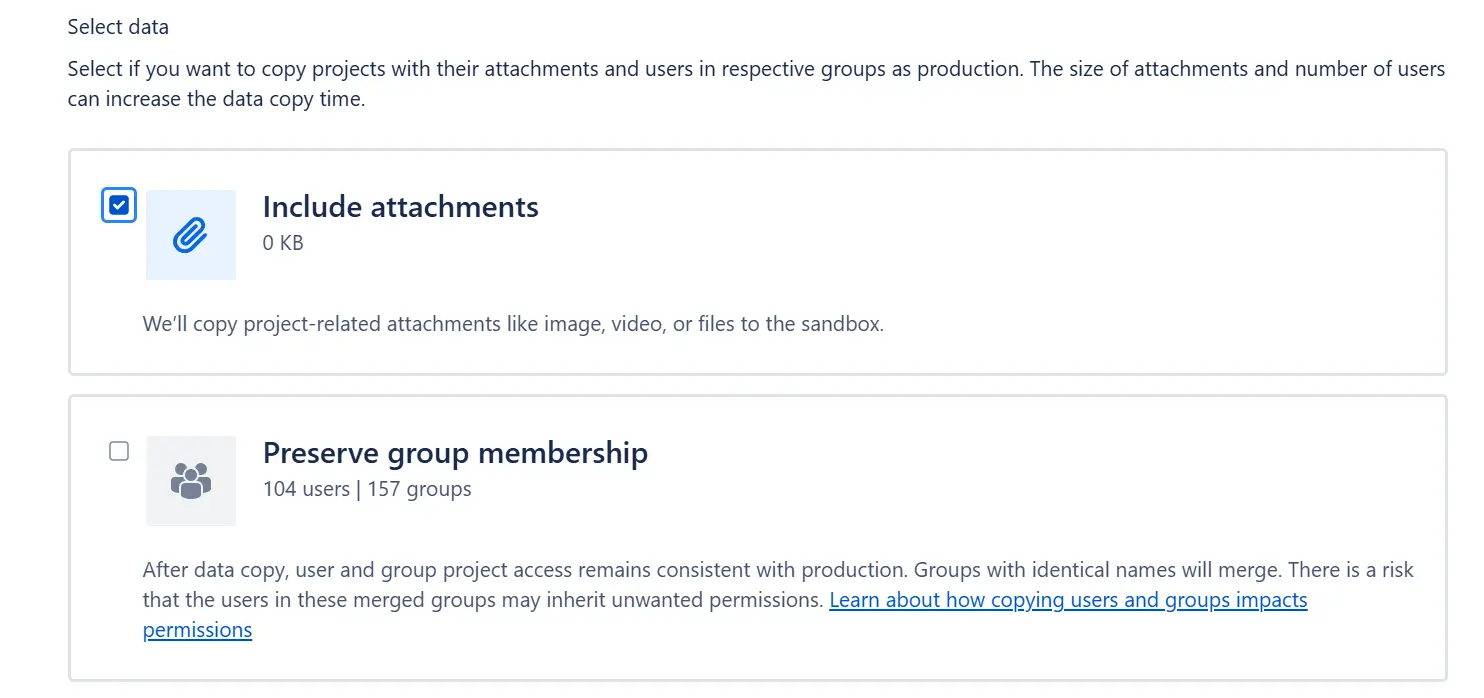
We can also choose whether we want to bring the attachments or not and if we want to keep the groups and users with the same permissions as in the production environment:
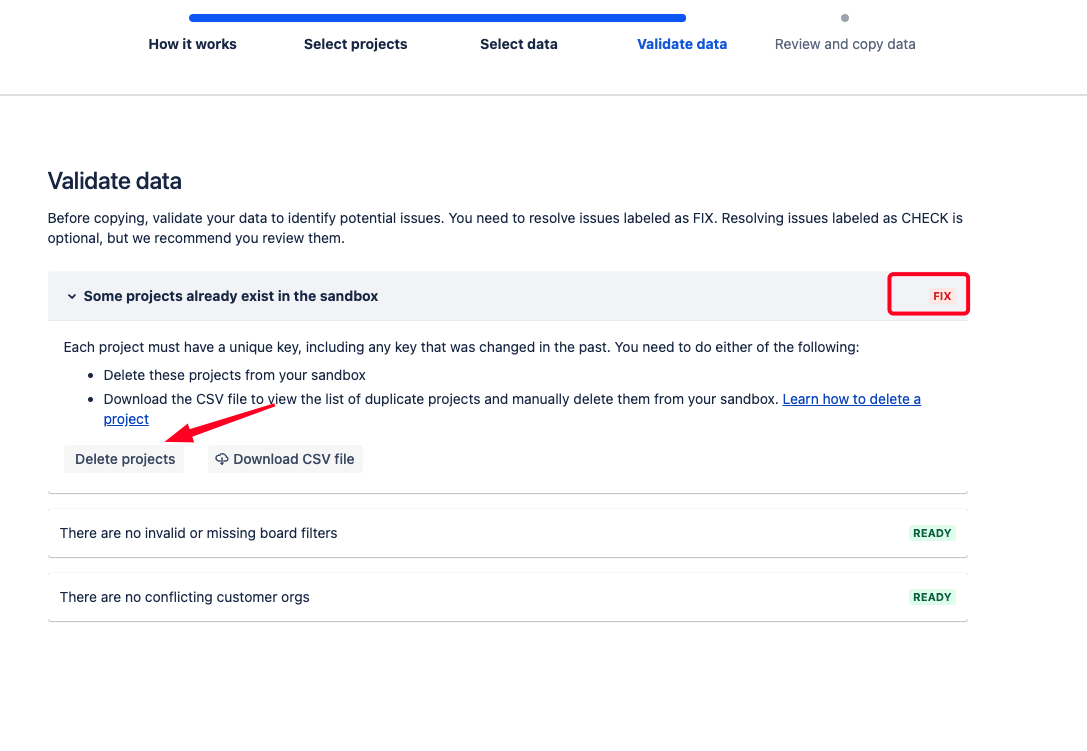
And it will validate that everything is ok to pass the information. If any problem is found, it will give us the option to repair it on the same screen as shown below. If it doesn't find any problem, it will let us continue without issues.
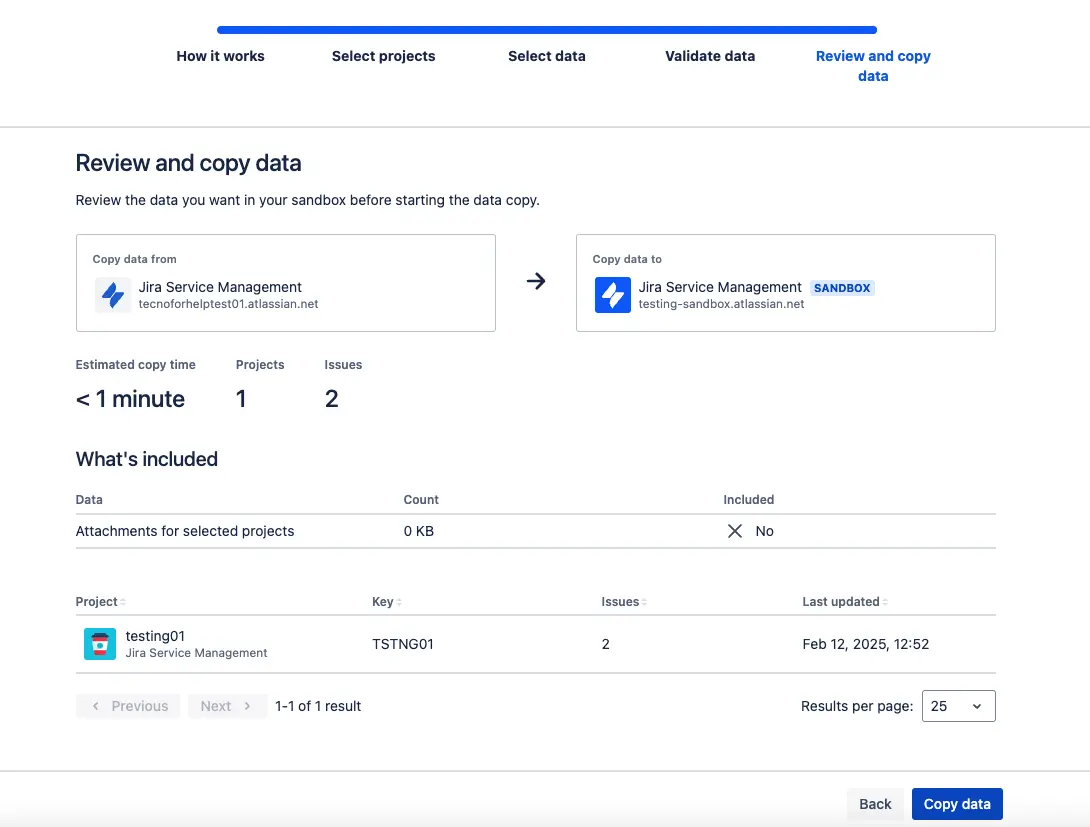
It will show us a summary screen and we will click on copy data to confirm the action. Luckily, it tells us the exact time the copy will take, so you can estimate exactly how much time you need each time you perform this action:
A pop-up will notify us as soon as the information is copied. And in the Sandbox section, within the administration menu, we can always see the real-time status of our instance.
Now that you have your Sandbox created, with all the information, you're surely thinking, and how do I migrate the configurations I've made to the production environment now?
The short answer is: copy and paste the configurations made in the environment.
The long answer is: there are Marketplace applications that can help you with this management 🙂
Conclusion
With Atlassian's current policy, for each Premium plan we have, we can have 1 Sandbox for each application, and only if this condition is met. For example, if we have the following licensing model:
-
Jira: Standard
-
Jira Service Management: Premium
-
Confluence: Premium
We will have a Sandbox only for Jira Service Management and Confluence.
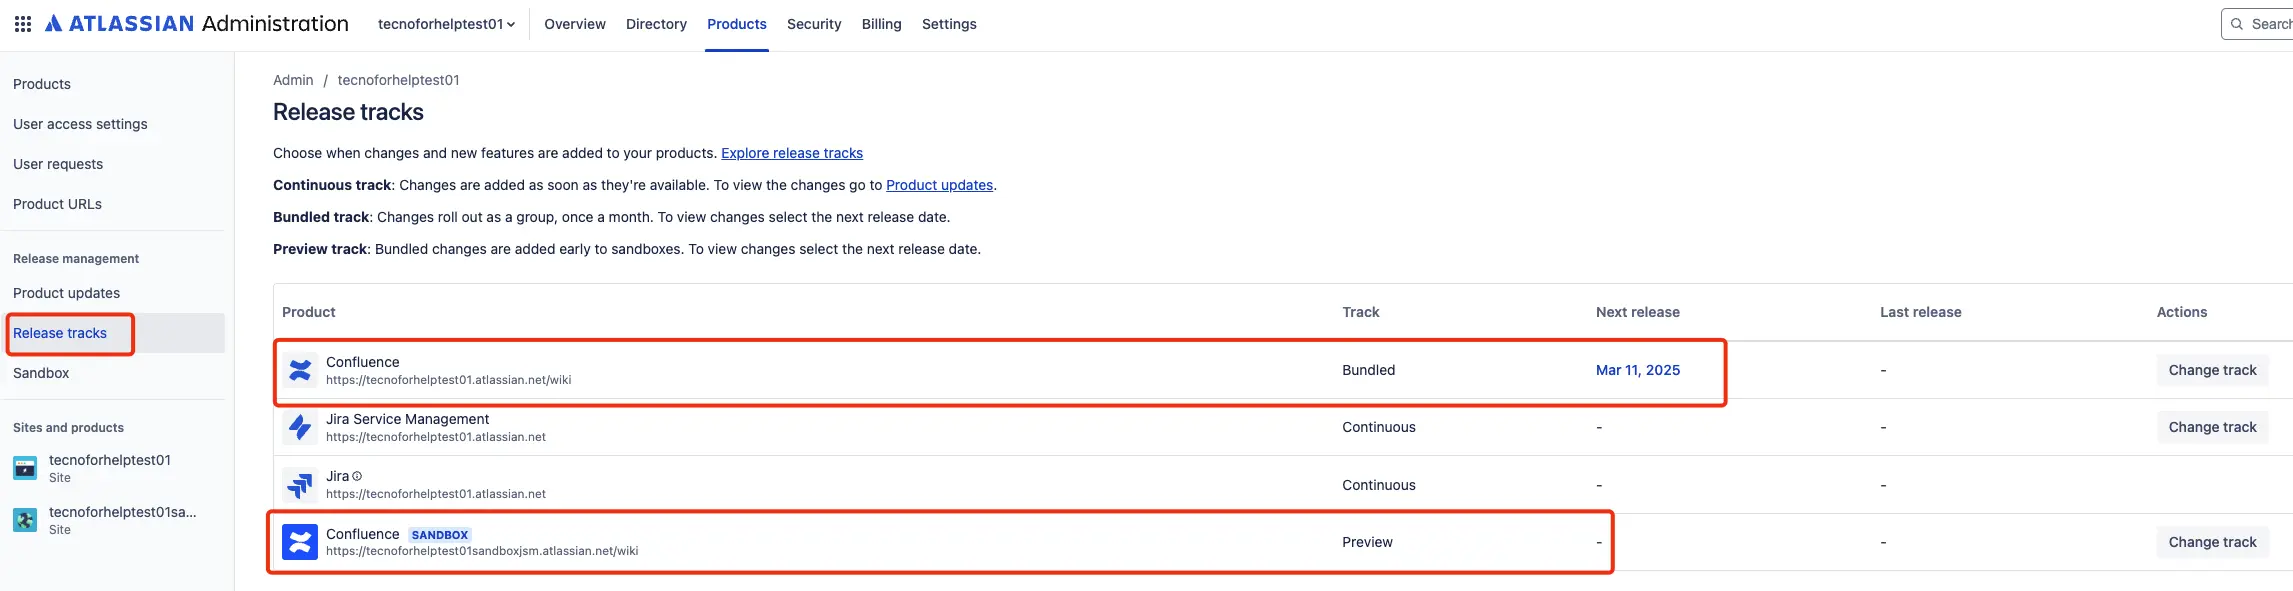
We are given the possibility that the new functionalities that Atlassian incorporates in its cloud version can be previously evaluated in our Sandbox environment, before their implementation in production. This will allow us to anticipate possible issues that might arise.
Recommendation
Currently, environments often have a high dependency on external Atlassian applications, for which, unfortunately, no configuration is transferred to our Sandbox environment, as Atlassian only replicates data related to the company's own products in the full copy. Consequently, the most effective way to have an environment as similar as possible to production would be as follows:
First installation:
1.Create an initial copy in the Sandbox environment.
2.Manually install and configure all add-ons in the Sandbox in the same way as in production.
ℹ️ Notes:
-
We can keep the Apps contracted in production permanently while the subscription is active, at no additional cost.
-
We can install the Apps in the Sandbox environment in their trial version to perform the necessary tests before their implementation in production.
Updating the Sandbox environment:
1.Make a specific copy of our most important projects or spaces every 15 days, following these steps.
2.Review possible changes in the configuration of the applications (new spaces, new custom fields, etc.).
This way, we will have an environment as close as possible to production and avoid the need to reconfigure the applications every time we perform a data copy to the Sandbox environment.
Enterprise environments
The aforementioned applies to Enterprise environments, with the particularity that, in this licensing model, Atlassian allows us to have up to 10 Sandboxes per product. However, there is a limit of 10 Sandboxes per site, which means that if we have 3 products under this modality, it will not be possible to configure a total of 30 Sandboxes, but only 10 in total.
Drawbacks of a Sandbox
Yes, we also want you to be aware of some limitations you will encounter when using these Atlassian Sandboxes:
-
Increases management complexity: managing multiple environments (Sandbox and production) can be complex and require planning and management to avoid problems. Its own maintenance can require additional resources, which can lead to increased operational costs.
-
Possible outdatedness: if not maintained correctly, it can become outdated compared to the production environment, which could lead to synchronization problems.
-
Does not allow for the promotion of specific functionalities to production: when any change is modified, developed, or implemented in the Sandbox environment and once tested and validated, the functionality will have to be replicated from scratch in the Production environment.
If you have any questions regarding Sandbox instances, please don't hesitate to contact our expert Atlassian team. Let's talk! :)
Our latest news
Interested in learning more about how we are constantly adapting to the new digital frontier?
Insight
April 27, 2026
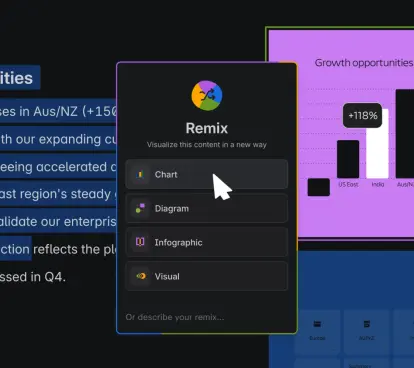
Remix with Rovo in Confluence: Transform Your Data into Visuals

Insight
April 13, 2026
What's New in Atlassian Goals: A Clearer View of Owners, Followers, and Labels

Insight
March 29, 2026
Jira Service Management Surveys: How to Create Advanced Satisfaction Surveys in Atlassian

Tech Insight
February 16, 2026
Atlassian Assets, now as a platform app